This article contains affiliate links. Learn more in our affiliate disclosure.
When I first heard about the East Railay Viewpoint in Thailand, I wasn’t sure what to expect – it looked like it wasn’t going to be an easy hike. Seeing the trailhead as I walked to Phra Nang Beach only confirmed that.
But after finally doing it, I can say it’s 100% worth the effort. The trail is short but steep, and yes, you’ll probably get dirty on the way up, but the view at the top is incredible.
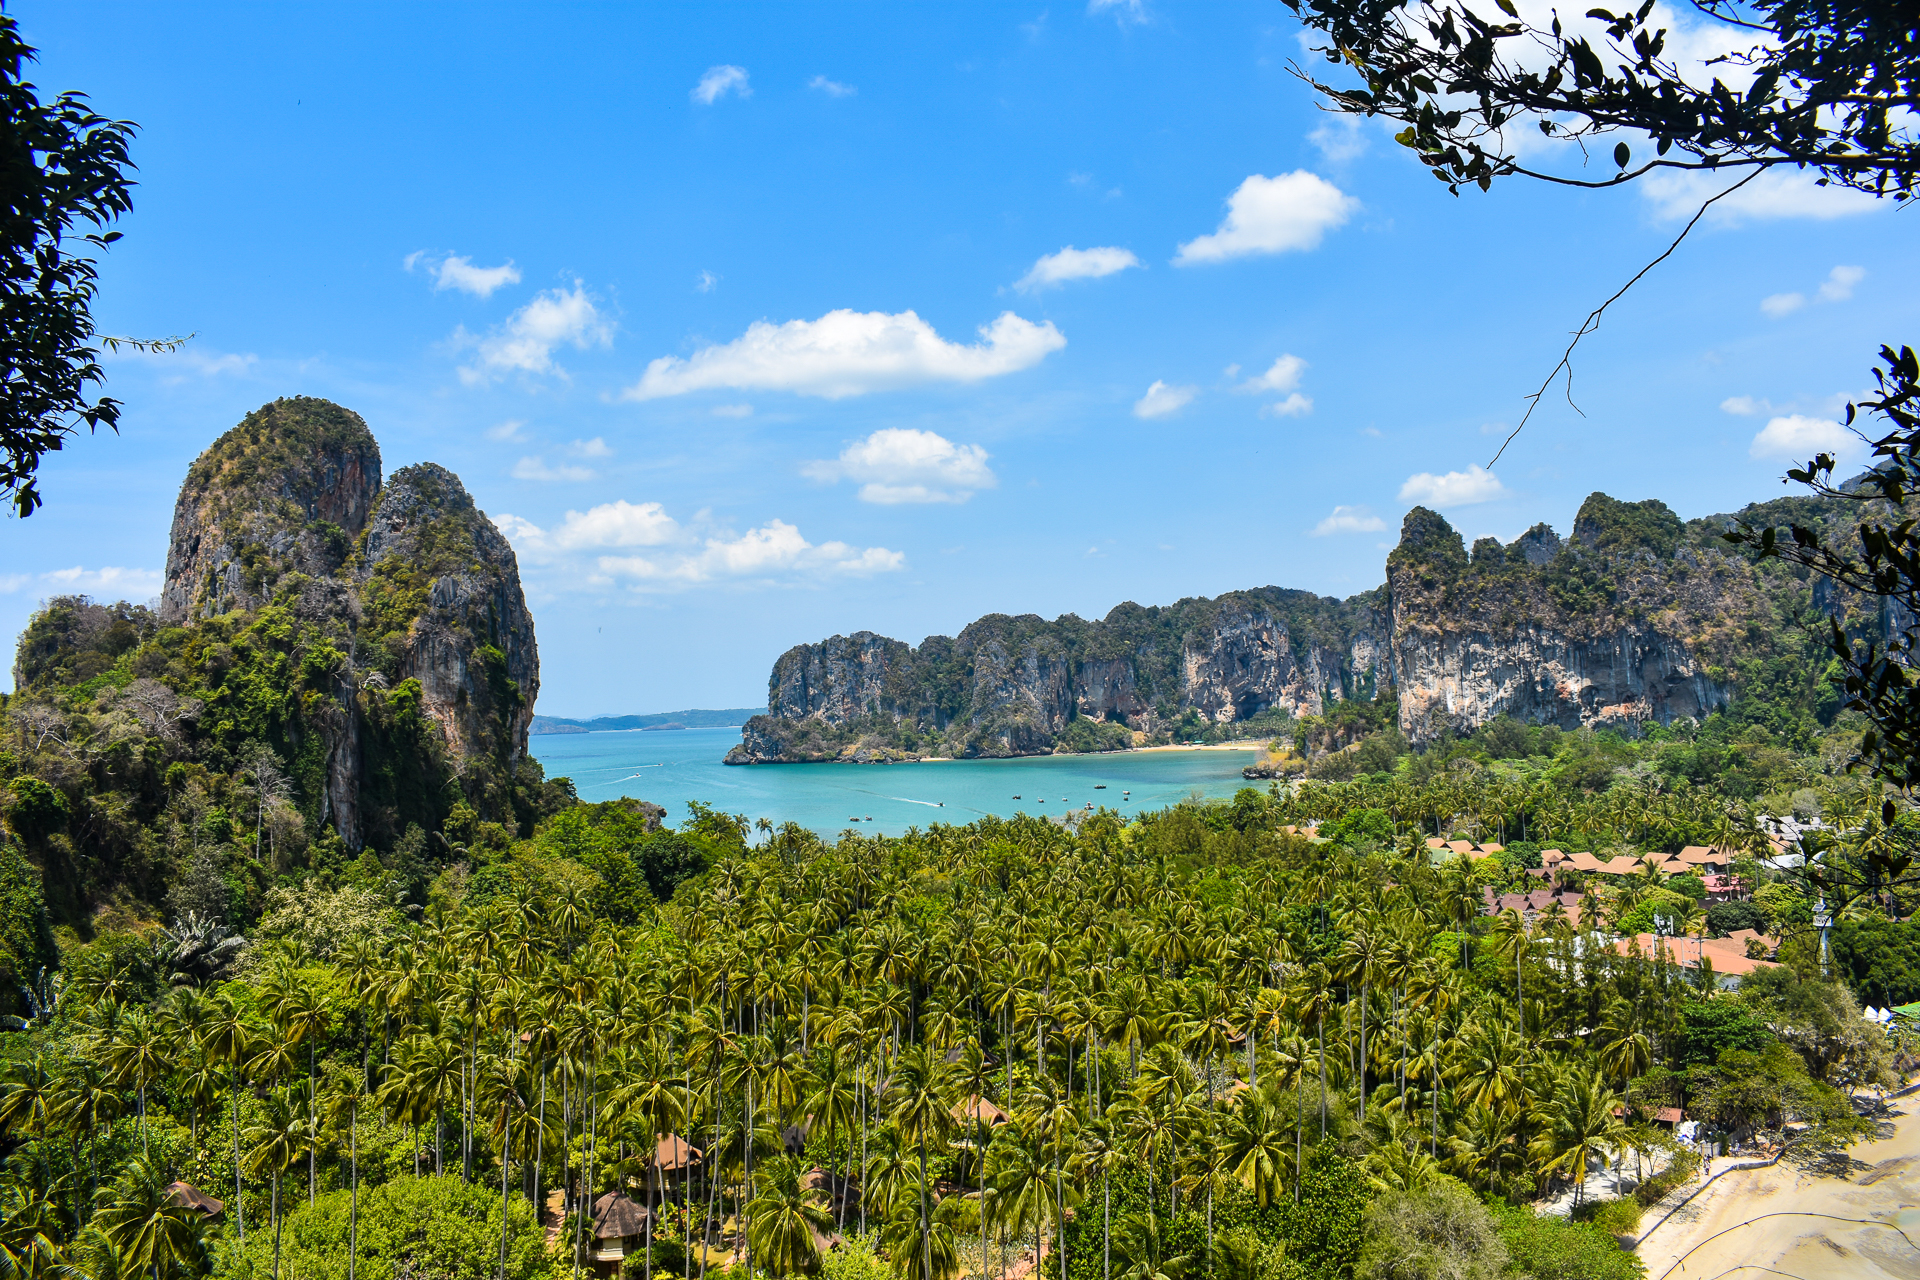
Standing there, looking out over Railay’s turquoise water, limestone cliffs, and hidden beaches, made every step worthwhile.
In this guide, I’ll share everything you need to know about hiking to the East Railay Viewpoint — how to find the trail, what to expect on the way up, and my tips to make the climb safer and easier.

Key Highlights
📍Start of trail: on the trail to Phra Nang Beach (map)
🥾Distance: around 300m one-way
🕥 Duration: 15-20 minutes
🔥 Difficulty: medium difficult (technically)
⭐️ Trail type: out-and-back
Why I think this hike is worth it?
For me, it wasn’t just about the view, but about the adventure of getting to the top. This isn’t some ordinary, flat walking trail; it’s a short but steep and muddy climb where you’ll be grabbing onto ropes, and probably ending up covered in mud.
And honestly, I loved it. I’m the kind of person who enjoys a bit of a challenge, and this hike delivered exactly that. The climb kept my heart pumping, but the reward at the top — with those insane views over Railay made every slippery step worth it.
In a hurry?
These are our top hotels in Railay we’d book again
⭐️⭐️⭐️ Rayavadee – Our top pick and a world-class resort hidden among cliffs and palm trees, offering direct access to three beaches, elegant villas, and an unforgettable cave-side restaurant experience.
👉 See prices & availability →
⭐️⭐️ Railay Phutawan Resort – Peaceful hillside retreat with panoramic sea views, a scenic infinity pool, and comfortable rooms.
👉 See prices & availability →
⭐️ Railay Garden View Resort – Laid-back bungalows surrounded by jungle and sea views, complete with hammocks and sunsets.
👉 See prices & availability →
East Railay Viewpoint Hiking Map

Getting to the trailhead
The hike is in Railay Beach, but if you’re looking for trail info, you’re probably already planning to visit. Since the peninsula is only accessible by boat, you’ll need to get here first — I’ve written a complete guide on how to get to Railay if you need the details.
If you want to explore this part of Thailand more, check out the best things to do in Krabi.
Once you’re in Railay, finding the trailhead is easy. Walk along the path that connects Railay East to Phra Nang Beach, and look to your left-hand side.
You’ll see some signs around the way, and you definitely won’t miss the wall of red-orange mud climbing steeply upward with ropes tied along the path. That’s where the trail begins.

The Trail Description
The trail to the East Railay Viewpoint can be split into two parts: a technical climb and a short non-technical walk. The only easy stretch is from the jungle crossroad to the viewpoint, which takes no more than five minutes.
Everything else requires a bit of effort and care.
Heading to Phuket next? Read about how to get from Krabi to Phuket.
Trailhead to the crossroad (technical)
The trailhead looks intimidating right from the start. The first thing I saw was an almost vertical wall of red mud, roots, and rocks, with a not-so-trustworthy rope dangling down.
I’d walked past this trail a few times before, so I came prepared in trainers — but I still saw plenty of tourists attempting it in flip-flops and bikinis. Honestly, I wouldn’t recommend that.
The first section is the hardest part of the entire climb to the view. It’s steep, slippery, and even the rope is caked in mud, which makes it difficult to hold. I actually found the vines and rocks more reliable for support.
Did you know that you can easily visit Phi Phi Islands by a direct boat from Railay?

If this first stretch already feels impossible, then it’s a good idea to turn back — because the rest of the hike won’t be any easier.
I took it slow, step by step, and within minutes I was sweating buckets, even though I’d started in the morning.
Along the way, I also spotted a few monkeys. My advice: don’t interact with them. On previous trips, I’ve seen them act aggressively, and I’ve learned to give them space. Definitely avoid feeding them.
This section only took around 10 minutes before reaching the crossroad. There’s a sign here pointing left towards the viewpoint and right towards the lagoon, but honestly, it’s so covered in stickers these days you can barely read it.

Crossroad to the viewpoint (non-technical)
From here, the trail suddenly gets easy. It’s just a leisurely walk through the jungle, about 100 meters long. Follow the main path, ignore the smaller turns, and within five minutes you’ll be there.
The East Railay Viewpoint
The area itself is small — it can fit maybe five people comfortably. In high season, it can get crowded quickly, but since I started early, I only shared it with one other couple.

The area is roped off because of the steep cliff, and through the trees you’ll see an amazing view: both Railay East and Railay West separated by a thin stretch of land, surrounded by turquoise water and limestone cliffs. It really does look like a postcard.
I spent some time catching my breath, taking photos, and just enjoying the view before heading back to the crossroad to continue towards the lagoon.

Crossroad to the Princess Lagoon (technical)
After making it to the top, I thought the hardest part was behind me. I was wrong. The descent to the lagoon is the steepest and most difficult section of the whole hike.
It should take about 10 minutes, but I paused more than once to reconsider my life choices. When I reached the last tall vertical rock wall with only a few sketchy ropes leading down, I stood at the top questioning if this is a good idea.

This part feels more like rock climbing than hiking.
No guide or special equipment is needed, but it’s definitely dangerous, and not something I’d recommend if you’re unsure about your ability. There’s even a spot where you have to squeeze through a hole in the rocks before climbing further down.

The Princess Lagoon
So, was it worth it? Honestly, my experience was mixed. I’d seen photos of the lagoon looking like an emerald paradise, but when I arrived, the water was muddy and brown. It didn’t look inviting for swimming, and no one else was in the water either.
I think it depends on the tide and recent weather — at high tide, it might be clearer and more beautiful. Even so, I enjoyed exploring the cliffs around the lagoon, and if you walk to the far side, there’s even a small cave to check out.


Return hike
The return is the same way you came. For me, climbing back up the rock wall felt easier than scrambling down. Still, I took my time and carefully retraced my steps to the trail leading to Phra Nang Beach.
I also wrote a complete guide to visiting Phra Nang Beach.
Facilities on the trail
There’s absolutely nothing on the trail — no bathrooms, no stalls, nothing. The closest toilets are the paid public ones near the entrance to Phra Nang Beach, and the nearest convenience store (rather a small stall) is at the start of Railay East Beach.
Bring plenty of water and maybe a light snack before you start the climb. You’ll thank yourself later.

When to hike
I don’t recommend hiking in the dark, so timing a sunset up there isn’t the best idea. The trail is steep, muddy, and not well-lit — coming down in the dark is risky.
Avoid the midday heat too; the climb is short but intense, and it can get brutally hot. Mornings are your best bet for a cooler, safer hike.
Also, if it’s been raining — or worse, if you’re here in the rainy season — I’d seriously reconsider. The trail gets extremely slippery, and while the ropes help, it’s just not worth the risk.

Where to stay in Railay
The area may be small, but the stays here range from simple jungle bungalows to some of Thailand’s most luxurious cliffside resorts.
If you’re still deciding which part of Krabi fits your trip best, take a look at our full guide on where to stay in Krabi— it breaks down each area with honest pros and cons plus hotel picks.
Here are our favorite places to stay in Railay:
⭐️⭐️⭐️ Rayavadee (our top pick) – This one’s pure paradise. Tucked between jungle and limestone cliffs, Rayavadee combines five-star luxury with the wild beauty of Railay. You can kayak straight from the beach, swim in a lagoon-style pool surrounded by palms, and have dinner inside The Grotto — a cave restaurant carved into the rock. Every villa feels private, often with monkeys and birds passing by. It’s the kind of place we’d book again in a heartbeat.
Best for: Honeymooners and anyone after the ultimate Railay escape.
👉 Check current deals →

⭐️⭐️ Railay Phutawan Resort – Perched above the cliffs, Phutawan Resort has that peaceful, hidden-away feel that’s perfect after a day of exploring the viewpoint. The infinity pool overlooks the sea, the sunsets are spectacular, and the restaurant’s views are just as good. The rooms are modern with warm, natural touches — comfortable without losing Railay’s laid-back charm.
Best for: Couples and travelers who want comfort and views.
👉 Compare prices →

⭐️ Railay Garden View Resort – Nestled in the green hillside above East Railay, Railay Garden View Resort feels close to nature in the best way. We stayed here and loved the quiet mornings with jungle sounds and sea views. The bungalows are simple and cozy, each with a hammock on the balcony — perfect for unwinding after hiking the viewpoint trail. It’s affordable, authentic, and has that easygoing Railay atmosphere we’d come back for.
Best for: Budget travelers who want charm and great views.
👉 See availability →
FAQs
Honestly, I wouldn’t recommend this hike for young kids. The trail is short but very intense and not the safest.
For older kids or teens who are adventurous and used to hiking, it might be doable with close supervision, but it’s definitely not an easy family-friendly walk.
Yes — the trail is mostly shaded thanks to the dense trees around it. That said, don’t underestimate the heat.
Yes — you’ll have cell service on the way up to the East Railay Viewpoint.
But if you plan to continue down to the lagoon (which is a much trickier and steeper descent), keep in mind that the signal gets weaker and weaker the closer you get. By the time you reach the lagoon, there’s no service at all.

Final Thoughts
Hiking to the East Railay Viewpoint (and possibly the lagoon) isn’t for everyone. It’s steep, muddy, and more of a climb than a hike in some parts. But if you’re up for a bit of adventure, I really recommend it.
The view itself is stunning — one of the best perspectives of Railay you’ll find, and it only takes about 15 minutes of effort to get there. The lagoon is trickier and honestly depends on conditions, so don’t push yourself if it feels unsafe.
I’d really say that Railay Beach, including this hike, needs to be a part of your Thailand itinerary.
For me, the combination of challenge, jungle atmosphere, and those postcard views made it a highlight of my time in Railay. If you go, just wear proper shoes, bring water, and start early. And most importantly, enjoy the adventure.