This article contains affiliate links. Learn more in our affiliate disclosure.
We planned our Pico do Arieiro hike in 2025 and couldn’t wait to do the full loop to Pico Ruivo. But while planning, we learned that the famous PR1 trail was still partially closed after wildfires in 2024.
Only a short section was open, which completely changed our plans. Instead of the full hike, we decided to experience what was accessible — and visited the trail just for sunset.
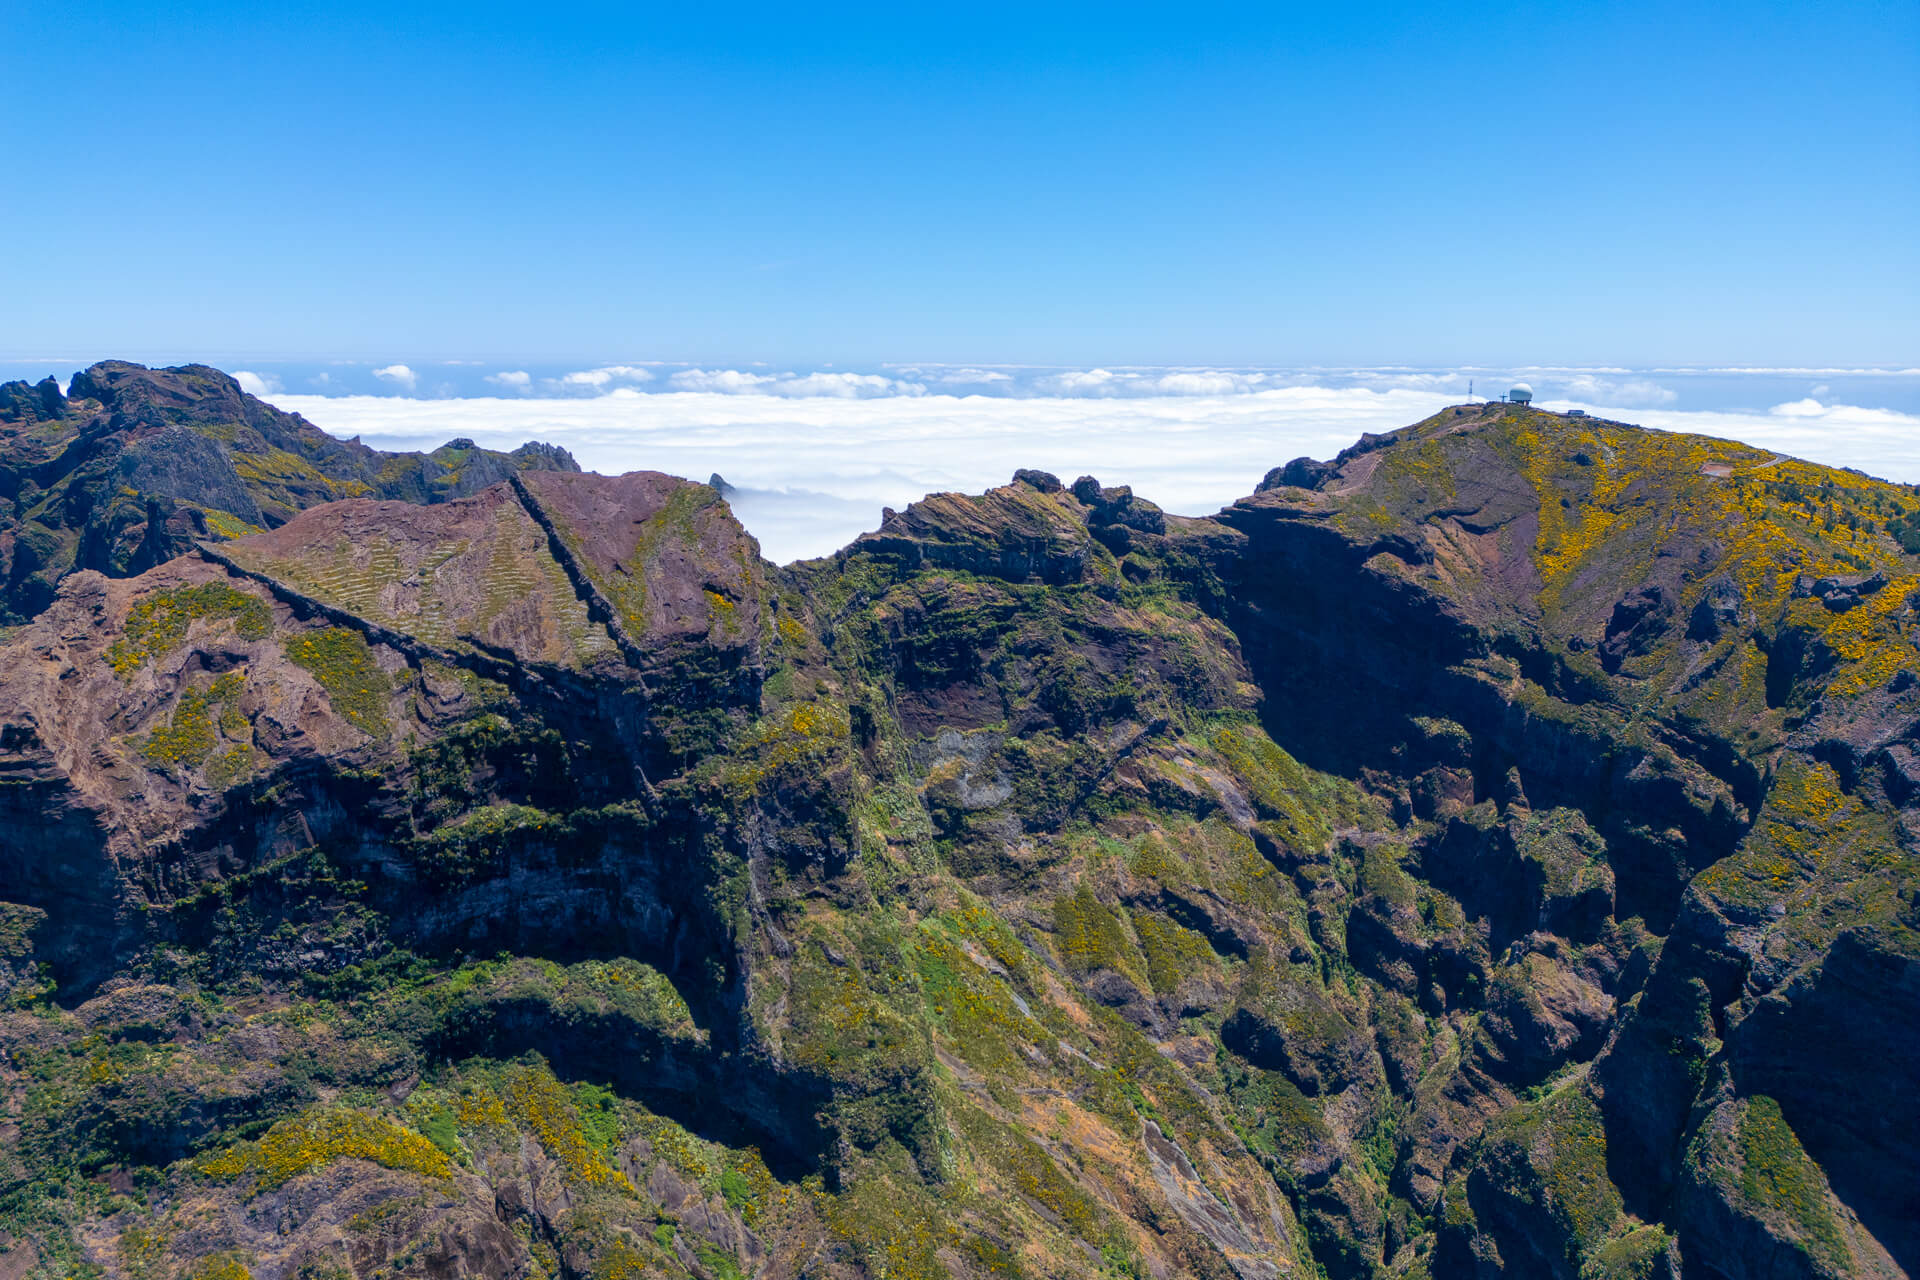
Even that short stretch reminded us why it’s one of the best hikes in Madeira. Sharp volcanic peaks, narrow ridgelines, endless stairs carved into the rock, and clouds drifting below your feet — it feels dramatic from the very first steps.
As the sun dropped, the light softened, the crowds thinned out, and the whole landscape took on that quiet, unreal atmosphere Madeira is famous for. This is definitely one of the best things to do in Madeira.
In this guide, we share everything you need to know to hike the full Pico do Arieiro to Pico Ruivo trail, plus how to visit for sunrise or sunset, which option makes the most sense for your trip, and all the practical tips — getting there, parking, trail conditions, and what to expect right now.
TIP: The whole trail is supposed to reopen in April 2026.

Key Highlights
📍Start of trail: Pico do Arieiro
🥾Distance: 2.8 km from Pico Arieiro to Pico Ruivo
🕥 Duration: 1.5 hours
⛰️ Elevation gain: 270 m
⬆️ Maximum elevation: 1862 m
🔥Difficulty: moderate
⭐️ Trail type: out-and-back
Why we think this hike is worth it?
Even with the trail limitations, Pico do Arieiro is still one of the most memorable hikes we’ve done in Madeira. The scenery hits immediately — dramatic ridgelines, jagged peaks, tunnels carved into the rock, and clouds rolling beneath you. It feels raw and exposed in the best way, very different from Madeira’s lush levada walks.
What really makes it worth it is how accessible yet epic it feels. You don’t need hours of hiking to get those wow views — even short sections deliver. We also loved how different the experience feels depending on timing.
Another great thing is that there’s plenty of hiking trails to suit everyone’s needs. Few places give you this level of payoff with so many flexible options.

In a hurry?
These are our top hotels in Madeira we’d book again
⭐️⭐️⭐️ Hotel Porto Mare – PortoBay (our top pick) – Elegant oceanfront resort in Funchal with tropical gardens, multiple pools, and warm service.
👉 See prices & availability →
⭐️⭐️ Aqua Natura Bay – Boutique-style stay in Porto Moniz with an infinity pool, panoramic Atlantic views, and direct access to the natural lava pools.
👉 See prices & availability →
⭐️ Quinta das Vinhas – Charming mid-range stay in Calheta surrounded by vineyards and mountain views, perfect for a peaceful countryside escape.
👉 See prices & availability →
Hiking Map
When to hike Pico do Arieiro
If you’re planning to hike the full Pico do Arieiro to Pico Ruivo route and back, an early start is essential. You’ll want enough daylight and better chances of stable weather. That said, to avoid the worst parking chaos, we’d actually recommend arriving after the main sunrise crowd has started leaving, rather than right at dawn.
If you’re only planning to walk a short section for scenic views, there are two times of day we recommend most:
Sunrise offers the highest chances of clear skies and that classic sea of clouds rolling over the mountains. The downside is the crowds. Many people arrive at the same time, traffic gets hectic, police often direct cars, and parking areas fill up fast. It can feel stressful, especially if you’re short on time.

To avoid all of that (and the early alarm), we opted for sunset — and honestly, we couldn’t have been happier. We parked right at the top without any issues, the atmosphere was calmer, and we only passed a handful of people on the trail. The sunset itself was incredible, with deep colors lighting up the peaks and valleys.
No matter when you go, always check the weather forecast before heading up — conditions can change quickly, and visibility makes all the difference up here. There’s also a webcam available.

Getting to the trailhead
By car
The road up to Pico do Arieiro is fully paved and in good condition, but it becomes narrow, steep, and winding as you get closer to the summit, with exposed sections and sharp turns. It’s not difficult to drive, but it does require a bit more focus — especially in low visibility or strong winds.
We had a rental car through DiscoverCars, which is the platform we use wherever we go. It compares prices from multiple suppliers, so you can quickly find the best option without checking each rental company separately.
We also always recommend adding full coverage insurance through the platform. It’s almost always cheaper than what rental companies offer at the counter, and it gives peace of mind when driving on unfamiliar mountain roads like these — allowing you to focus on the experience rather than potential damage or extra fees.

Parking & Parking fees
There are two official car parks. The upper car park is located right at the start of the trail and is the most convenient option, but it’s also the more expensive one. The lower car park sits slightly below the summit and is used once the upper lot fills up.
If the upper car park is full, you’ll need to park in the lower one. From there, you can either walk uphill to the trailheador take the shuttle bus, which runs frequently during high season — roughly every 15 minutes.

The upper car park costs €20 per day, with hourly rates available if you’re staying for a shorter visit. Payment is done at a ticket machine, and you can pay by card or cash.
During peak times, especially around sunrise, both car parks can fill quickly, so it’s worth factoring this into your timing.
Read our full guide about renting a car in Madeira.

By public bus
You can reach the area by public bus from Funchal, which is a good option if you don’t have a car. The buses run regularly between the city and the summit. During the high season it’s every 15 minutes.
The bus starts near the lower cable car station to Monte called Teleférico Término, and takes you directly up to Pico do Arieiro. A one-way ticket costs €3 per person and is paid in cash to the driver once you’re on board.
If you want full flexibility or plan to stay late, driving or joining a transfer is still easier, but for a budget-friendly option, the public bus does the job.

By organized transfer
If you don’t want to drive — or you’re planning a one-way hike — an organized transfer is one of the best options. We recommend this Pico do Arieiro sunrise hiking transfer from Funchal, which takes care of transport logistics so you can focus on the hike itself.
This option is especially useful if you want to do the full hike from Pico do Arieiro to Pico Ruivo and continue to Achada do Teixeira. Since it’s a point-to-point route that starts and ends in different locations, having transport arranged in advance makes things much easier.
During periods when the main PR1 trail is partially closed, some transfers still operate with alternative hiking options along PR3, depending on current conditions and access.


Our Madeira Google Maps
Built from our real trips around Madeira — only places we actually visited and loved.
No random saves. No wasted time. Just a ready-to-use map that helps you explore the island in a way that actually makes sense.
92 handpicked spots, including:
📍 The best attractions & unique places
🥾 Our favorite hikes & scenic viewpoints
🍜 Restaurants and cafés we’d go back to
🚠Scenic cable cars
PR 1 Pico do Arieiro to Achada do Teixeira Trail Description
Distance: 8.3 km
Elevation gain: 500 m
Duration: 5 hours
Note: During our visit, the trail was closed beyond the Stairway to Heaven, so everything after that point is based on the official route layout and what to expect when the full PR1 is open.

Pico do Arieiro
We started the hike right at Pico do Arieiro, next to the meteorological station and the main viewpoint. There’s no warm-up here — the trail drops straight into a long series of stone stairs carved into the mountain. Within minutes, you’re walking along a narrow ridge with deep valleys on both sides, and the views are already unreal.
This is a section where it’s really important to stay on the marked path. The rock is volcanic, uneven, and can be slippery, especially if there’s moisture in the air. Stepping off-trail isn’t just risky — in some places it could be fatal. We found the path well maintained, but it demands attention.
As we descended, the trail followed the mountain crest with endless stairs, giving us strong “Stairway to Heaven” vibes, just a bit less dramatic — and much quieter at this early stage.

Ninho da Manta Viewpoint
Not long after the descent, we took the short detour to Ninho da Manta viewpoint, which only adds about 5 minutes. It feels like a small wooden balcony hanging over the valley, and it’s absolutely worth the stop.
From here, the landscape opens up beautifully. The valley below often fills with clouds, and when they start moving through, the whole place feels calm and almost surreal.

Stairway to Heaven
After returning to the main trail, the route climbs gently toward the famous Stairway to Heaven. This part is more exposed, but we always felt secure — all risky sections are protected with railings and fences. As long as you’re comfortable with heights and keep steady footing, it’s manageable.
The stairs stretch along a sharp ridgeline, with views in every direction. This is where we stopped for sunset, and honestly, it was the highlight of our visit. The light changed fast, the colors were intense, and by this time, there were only a few people around.
This is also where the current trail closure starts, so we didn’t continue beyond this point.

Pico Ruivo (when the full trail is open)
When PR1 is fully accessible, the trail continues past the Stairway to Heaven with a mix of ascents and descents, often on stairs and narrow mountain paths. All exposed sections are secured, but during busy summer months, this part can take longer as hikers move in single file.
You’ll also pass through several tunnels, so carrying a headlamp or phone light is essential. Eventually, the trail reaches Casa do Abrigo, a mountain hut where the route splits. There are bathrooms, but the hut isn’t always open, so it’s best not to rely on it.
From here, it’s a short but steep 0.5 km climb up to Pico Ruivo, the highest point on Madeira.
TIP: If you don’t have a shuttle or taxi arranged from Achada do Teixeira, you’ll need to return the same way — hiking back from Pico Ruivo to Pico do Arieiro.

Achada do Teixeira
From Casa do Abrigo, the final section toward Achada do Teixeira is much more relaxed. It’s a gradual descent, less technical, and a nice way to finish such a dramatic hike.
This stretch is about 2.9 km and usually takes around one hour, with wide views and a calmer atmosphere.
TIP: If you plan to finish the whole hike, we recommend booking this organized transfer that will drop you off at Pico do Arieiro in the morning and pick you up at Achada do Teixeira once you’re done.

Sunrise & Sunset viewpoints recommendations
Sunset (our experience)
We spent sunset time around the Stairway to Heaven, and it turned out to be a great choice — dramatic ridgelines and warm light hitting the peaks.
That said, if we had more time, we’d actually choose to stay right at the start of the trail, where the first long descent down the stairs begins. This is one of the highest points along this section of PR1, and the views open up immediately in multiple directions.

Sunrise
For sunrise, it’s best to stay very close to the Pico do Arieiro viewpoint and meteorological station. This area faces east and gives you the best chance of seeing the sun come up above the clouds, often with a classic sea of clouds rolling through the valleys below.
Going further along the trail in the dark doesn’t add much for sunrise views and usually just means navigating stairs with a headlamp among crowds.

Facilities on the trail
Facilities along the trail are very limited, so it’s best to come prepared.
Near the trail start, you’ll usually find basic facilities such as toilets and a small café or snack bar, though opening hours can be irregular, especially early in the morning or around sunset.
We came unprepared with a little water left, but the shops were already closed.

Once you’re on the trail, there are no facilities at all until you reach Casa do Abrigo near Pico Ruivo. This mountain hut has bathrooms, but it’s not always open, and there’s no guarantee you’ll be able to buy food or drinks there — we wouldn’t count on it.
There are no water refill points along the trail, so bring enough water for the entire hike. The same goes for snacks, layers, and a light source if you’re hiking early or late in the day.

Where to eat
- Boutique do Areeiro – Located right at the summit near the trail start. It serves basic snacks, soups, salads, and sandwiches. That said, reviews aren’t great, especially for the price, so we’d personally skip it unless you really need something quick.
- Achada do Teixeira Mountain Spot Café – A much nicer option if you’re finishing the hike in Achada do Teixeira. It’s simple but relaxed, with drinks and light food, and works well as a post-hike stop before heading back.
Trail difficulty
This is a challenging mountain hike, even though parts of it are well maintained and secured.
The main difficulty comes from the constant elevation changes, long stair sections, and exposed ridgelines. You’re either going up or down most of the time, and the stairs can be tough on the knees.
Technically, the trail isn’t difficult if you’re comfortable with heights. All exposed sections are protected with railings, and the path is clearly marked.
We only did a short section and managed it just fine, even with Ema (6-months-old) in a baby carrier. But we met some people with fear of heights who were ratehr scared of walking around the trail.

Where to stay in Madeira
Madeira offers a wide mix of stays — from large coastal resorts to quiet countryside retreats surrounded by vineyards and mountains. Where you stay really depends on how you plan to explore the island: Funchal and the south coast are best for convenience and dining, while the north coast and rural interior feel wilder and more atmospheric.
If you’re still deciding which part of Madeira suits you best, check out our full guide on where to stay in Madeira — it breaks down the best areas, including hand-picked hotel recommendations.

Here are the places we’d happily book again:
⭐️⭐️⭐️ Hotel Porto Mare – PortoBay (our top pick) – We stayed here and honestly loved how easy and comfortable everything felt. The hotel is set within lush gardens, the rooms are spacious and quiet, and the whole place has a calm, resort-style atmosphere without feeling over the top. Food was a highlight for us — generous, fresh, and well organised. We especially enjoyed the themed dinners.
The location worked perfectly as a base for exploring the island while still being close to Funchal’s restaurants and waterfront. It’s one of those hotels we’d book again without hesitation, especially for a longer stay.
Best for: a relaxed, high-quality base with great facilities
👉 Check current deals →

⭐️⭐️ Aqua Natura Bay – We also stayed at Aqua Natura Bay, and the location alone makes it special. Being right next to the Porto Moniz natural pools means you can enjoy them early or late, once the day-trippers leave. Many rooms face the ocean, and falling asleep to the sound of waves is part of the experience here.
The hotel feels modern and well maintained, with a focus on comfort rather than luxury. If we were planning a trip focused on the north coast, we’d happily stay here again.
Best for: ocean views and exploring Madeira’s wild north
👉 Compare prices →

⭐️ Quinta das Vinhas – This one offers a completely different experience — quiet, rural, and surrounded by vineyards and old stone buildings. It feels more like staying on a traditional Madeiran estate than in a hotel.
If we wanted to slow down for a few nights and experience a more authentic side of the island, this would be a dream stay.
Best for: a peaceful countryside escape with character
👉 See availability →
FAQs
It’s not dangerous if you stay on the marked trail and hike in good conditions. Exposed sections are secured with railings, but the terrain is volcanic, uneven, and unforgiving — a wrong step off-trail can be serious.
Yes. Proper footwear with good grip is strongly recommended. The stairs and rocky sections can be slippery, especially in wind or moisture.
Only partially. Fit beginners can handle short sections, but the full hike is demanding due to elevation changes, stairs, and exposure. It’s not a casual walk.
Skip it. Visibility and wind make a huge difference here, and conditions can change quickly. Clear weather is key to enjoying this hike safely.

Final Thoughts
Even with the current trail limitations, Pico do Arieiro is one of the most impressive places we visited in Madeira. The landscape feels raw and dramatic, the views hit immediately, and you don’t need to commit to a full-day hike to experience just how special this area is.
If the full PR1 route is open during your visit, hiking all the way to Pico Ruivo and Achada do Teixeira is an unforgettable mountain experience. But if it’s not — or if you’re short on time — walking just the first section is still 100% worth it.
Sunset in particular surprised us in the best way: calmer, less chaotic, and absolutely stunning.
Our biggest advice is to plan around the weather, choose the timing that fits your travel style, and be realistic about your fitness and comfort with heights. Do that, and Pico do Arieiro will likely end up being one of the highlights of your Madeira trip — just like it was for us.